


Guide to Tiling on Wooden Floors
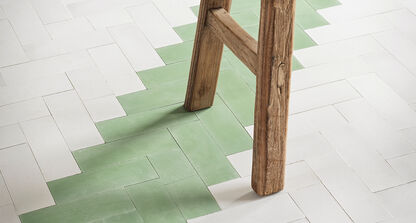
Tiles are a great flooring option for pretty much any room in your home. They are durable, easy to clean, and available in endless colours and designs to complement your décor. This practicality makes them a particularly attractive choice compared to higher-maintenance flooring options, and you may find yourself wanting to tile over your floorboards.
While tiling on wooden floors is a pretty straightforward DIY job, it’s not as simple as just laying the tiles directly on top of the floorboards. If you’re looking to add floor tiles to a room with a wooden floor, there are a few things that you need to know beforehand.
Can you tile over floorboards?
The good news for those that want to replace plain floorboards with tiles is that you can indeed tile over wooden floors. There’s no need to concrete over the boards or rip them up to start again. However, you can’t lay tiles directly onto the floorboards.
As wooden floors are made up of many individual boards, they are flexible and susceptible to movement. This movement can cause tiles and grout to crack. Before laying tiles over the floorboards, you need to add a layer of board in between to provide a flat, even surface.
Preparing floorboards for tiling
Before we get to boarding over the tiles, the first step is to make sure that there aren’t any loose floorboards.
Remove all the furniture from the room and pull up any existing carpet or other flooring to expose the bare boards. Walk around the room and use a pencil to mark any boards that creak or move when you step on them. You’ll then need to add a few additional screws to secure the loose boards.
Make sure to use short screws so you don’t puncture any hidden pipes or wires underneath the floor. Countersunk screws are the best option to provide a flat surface for you to tile over.
When you secure them, you’re looking to screw into the joists below, which run perpendicular to the boards. A handy way to locate the joists is to position any additional screws close to the existing nails. This will again help you to avoid any pipes.
Selecting your overboard
There are two main options available for the overboard to prepare your wooden floor for tiling.
The first option is plywood, which is readily available in DIY stores. To ensure a rigid base for your tiles, opt for a thickness of at least 12mm. However, it’s worth bearing in mind that the thickness of the plywood, as well as the thickness of your tiles, will raise the height of the floor. 15mm plywood offers a good balance of sturdiness and a slimmer profile.
Another choice is tile backer board, which is specially designed to provide an even base when laying tiles. This means that it is thinner than plywood, and different thicknesses are available to suit your requirements. There are also waterproof backer boards for use in bathrooms and wet rooms. Again, they can be easily found in most DIY stores.
Laying the overboard
When laying the overboard, it’s a good idea to put all of the pieces in place first to check that you have enough before securing the boards. Measure, cut and place your boards, making sure there are no gaps that could cause movement. Start with the larger, simpler areas and save any awkward corners and crevices until the end.
A combination of screws and adhesive is the best way to ensure that there is as little movement as possible underneath the tiles. Working outwards from a corner, use a caulk gun and tile adhesive to secure the overboard to the wooden floor. Ensure that you also apply adhesive to the edges where two overboards meet to keep everything nice and flat.
Once you’ve glued down a section, use countersunk screws every 15cm to ensure that the overboard is fixed firmly in position. Remember to do this as you go to avoid knocking sections out of place as you work. If you’re using backer board, you may need to drill pilot holes for the screws.
Before laying your tiles
The last step before you can start laying your tiles is to coat the new floor surface with an even layer of diluted SBR primer. Leave the primer to dry, which should take around two hours. This will provide a tacky, grippy surface to fix your tiles to, as well as offering improved waterproofing.
When selecting grout and adhesive for tiling on wooden floors, make sure to choose flexible options, as these will allow for slight movement and prevent cracks. All of our Norcross ancillaries are created with flexible additives, making them an excellent choice for tiling over floorboards.
If you’re unsure what to choose, we can advise you on the correct quantity and type of adhesive and grout for your project. We can even suggest the perfect grout colour to compliment your tile choice.