


How do I measure a room?
Whether you are renovating or working on a new build, we can will help you achieve a space that’s perfect for you. Having the correct measurements and details are important, but don’t worry if you find this a little daunting. If you’ve never measured a room before it’s straightforward and won’t take long. Simply follow the step-by-step guide below – and you will need a notepad, pencil, ruler and measuring tape.
STEP 1
Sketch out the space

Make a sketch of the existing space. Make a simple drawing of the overall room, using a pencil and ruler. The sketch should be a plan drawing as if you were looking down from above. Start from one corner of the space and work clockwise, including details of where any windows and doors are and other fixed items you intend to keep in place, such as fireplaces or cabinetry.
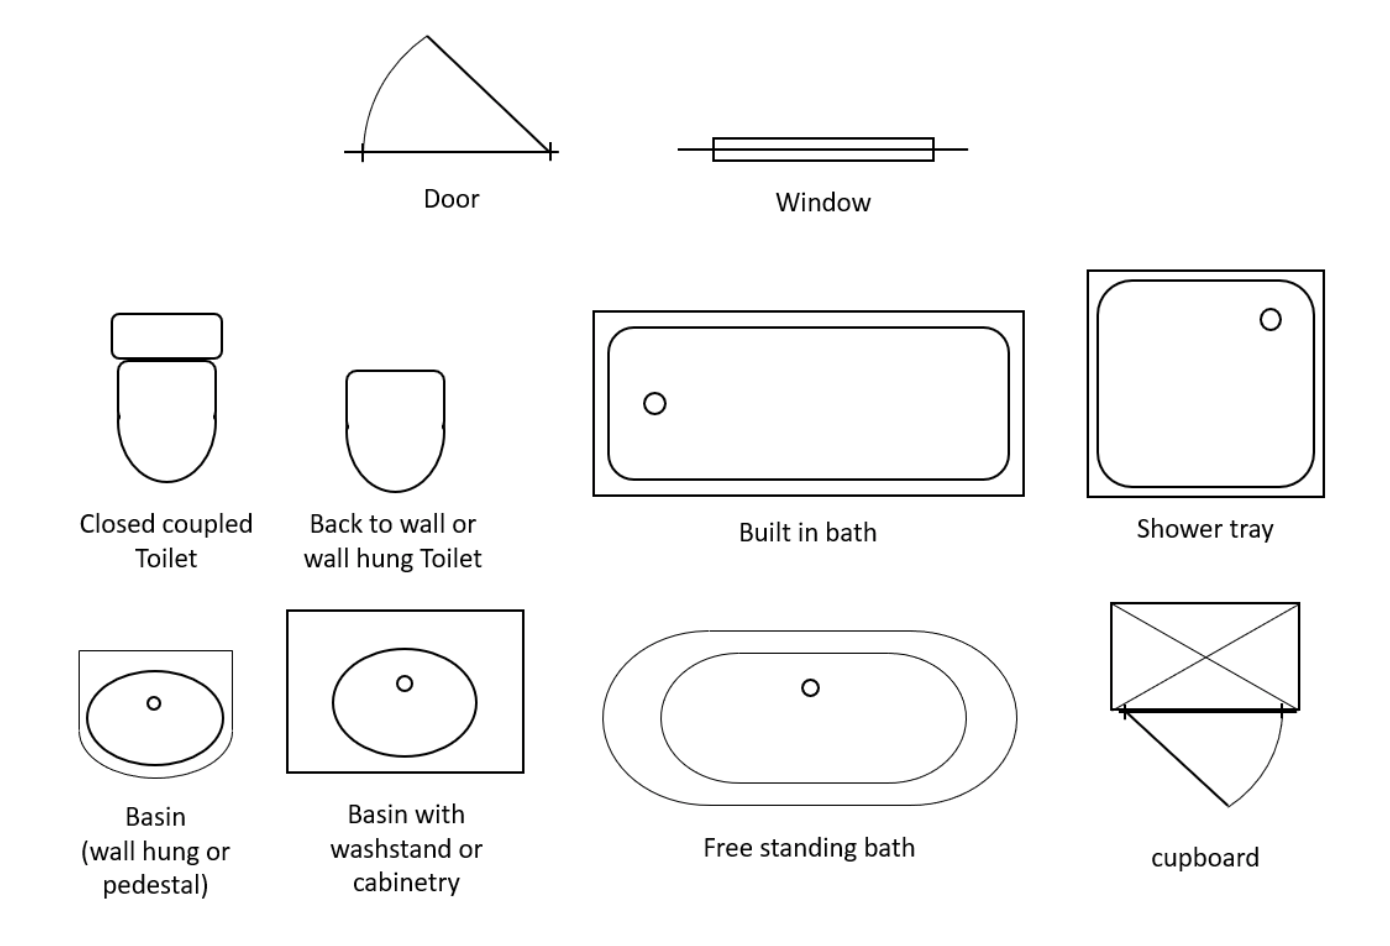
Below are some simple drawing symbols which illustrate items you may have in the room. You can use these examples in your own sketch.
STEP 2
Measuring walls

Keep all measurements in millimetres as our designer’s work using this unit. The first measurements you need are the wall lengths. You may find it easier having another person assist you with this. Simply measure from one end of a wall to another. In large spaces this can be difficult, so you may like to break the length of the wall down using items in the room, which you can measure to and from. For example, if on one wall you have a basin, you can measure to the edge of the basin from one corner of the room, then measure the basin. Finally, you can measure from the other edge of the basin to the opposite corner. Combine these measurements and you will have the total length of the wall. This could also be done using windows, toilets or doors.
Not all walls or floors are completely straight, however, and variations can occur, especially in older properties, so it’s worth taking measurements at different points throughout the room.
STEP 3
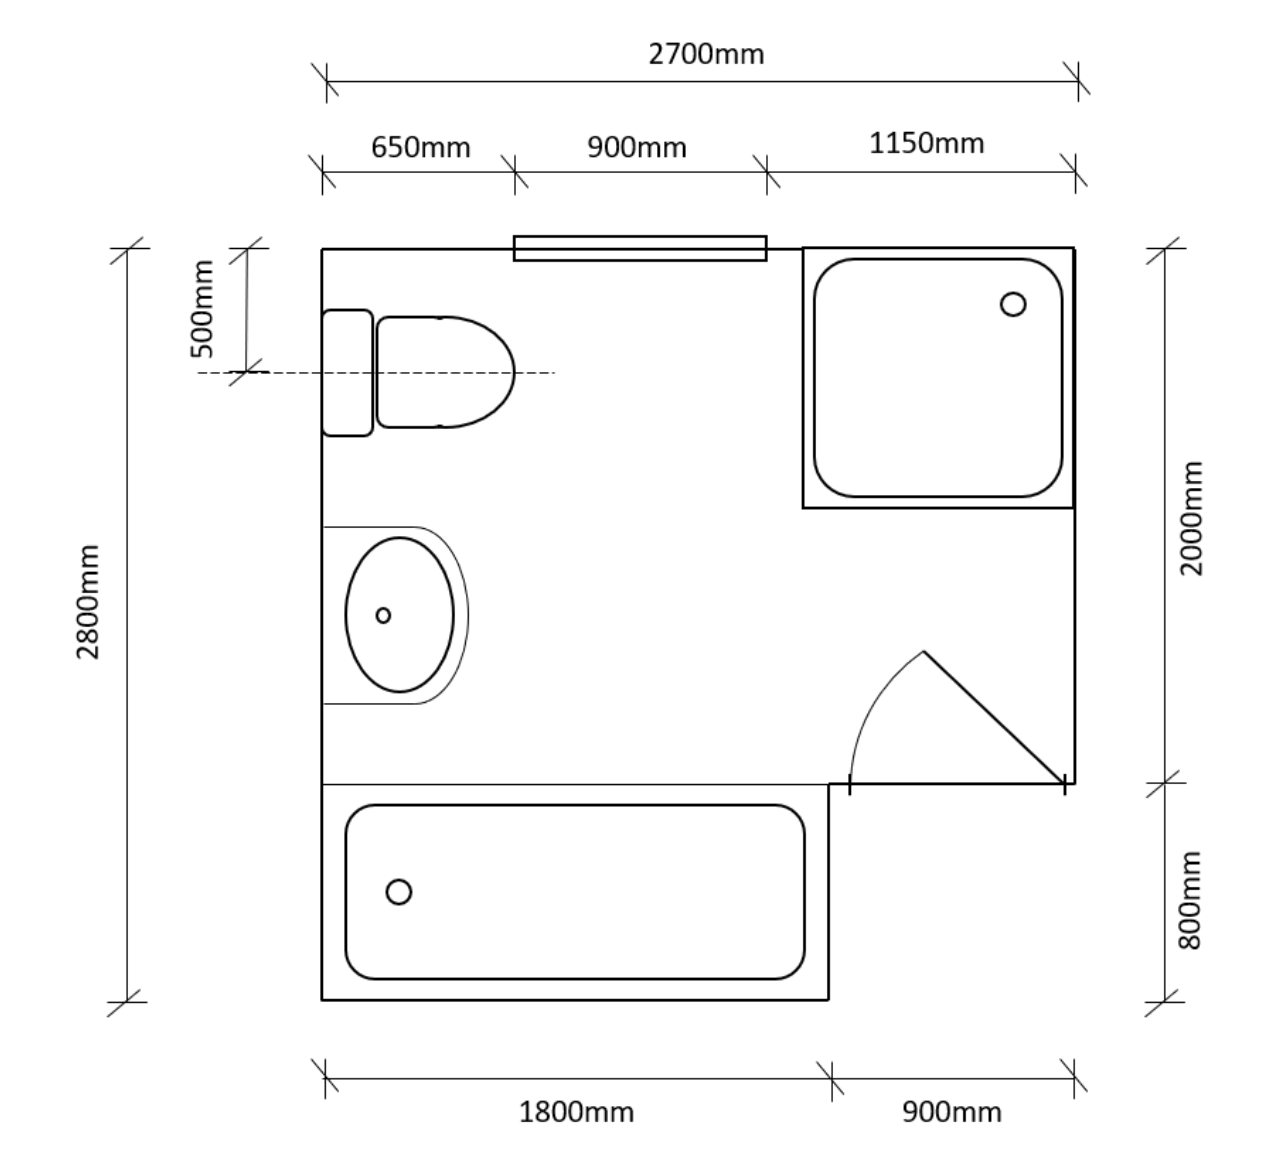
Adding detailed measurements

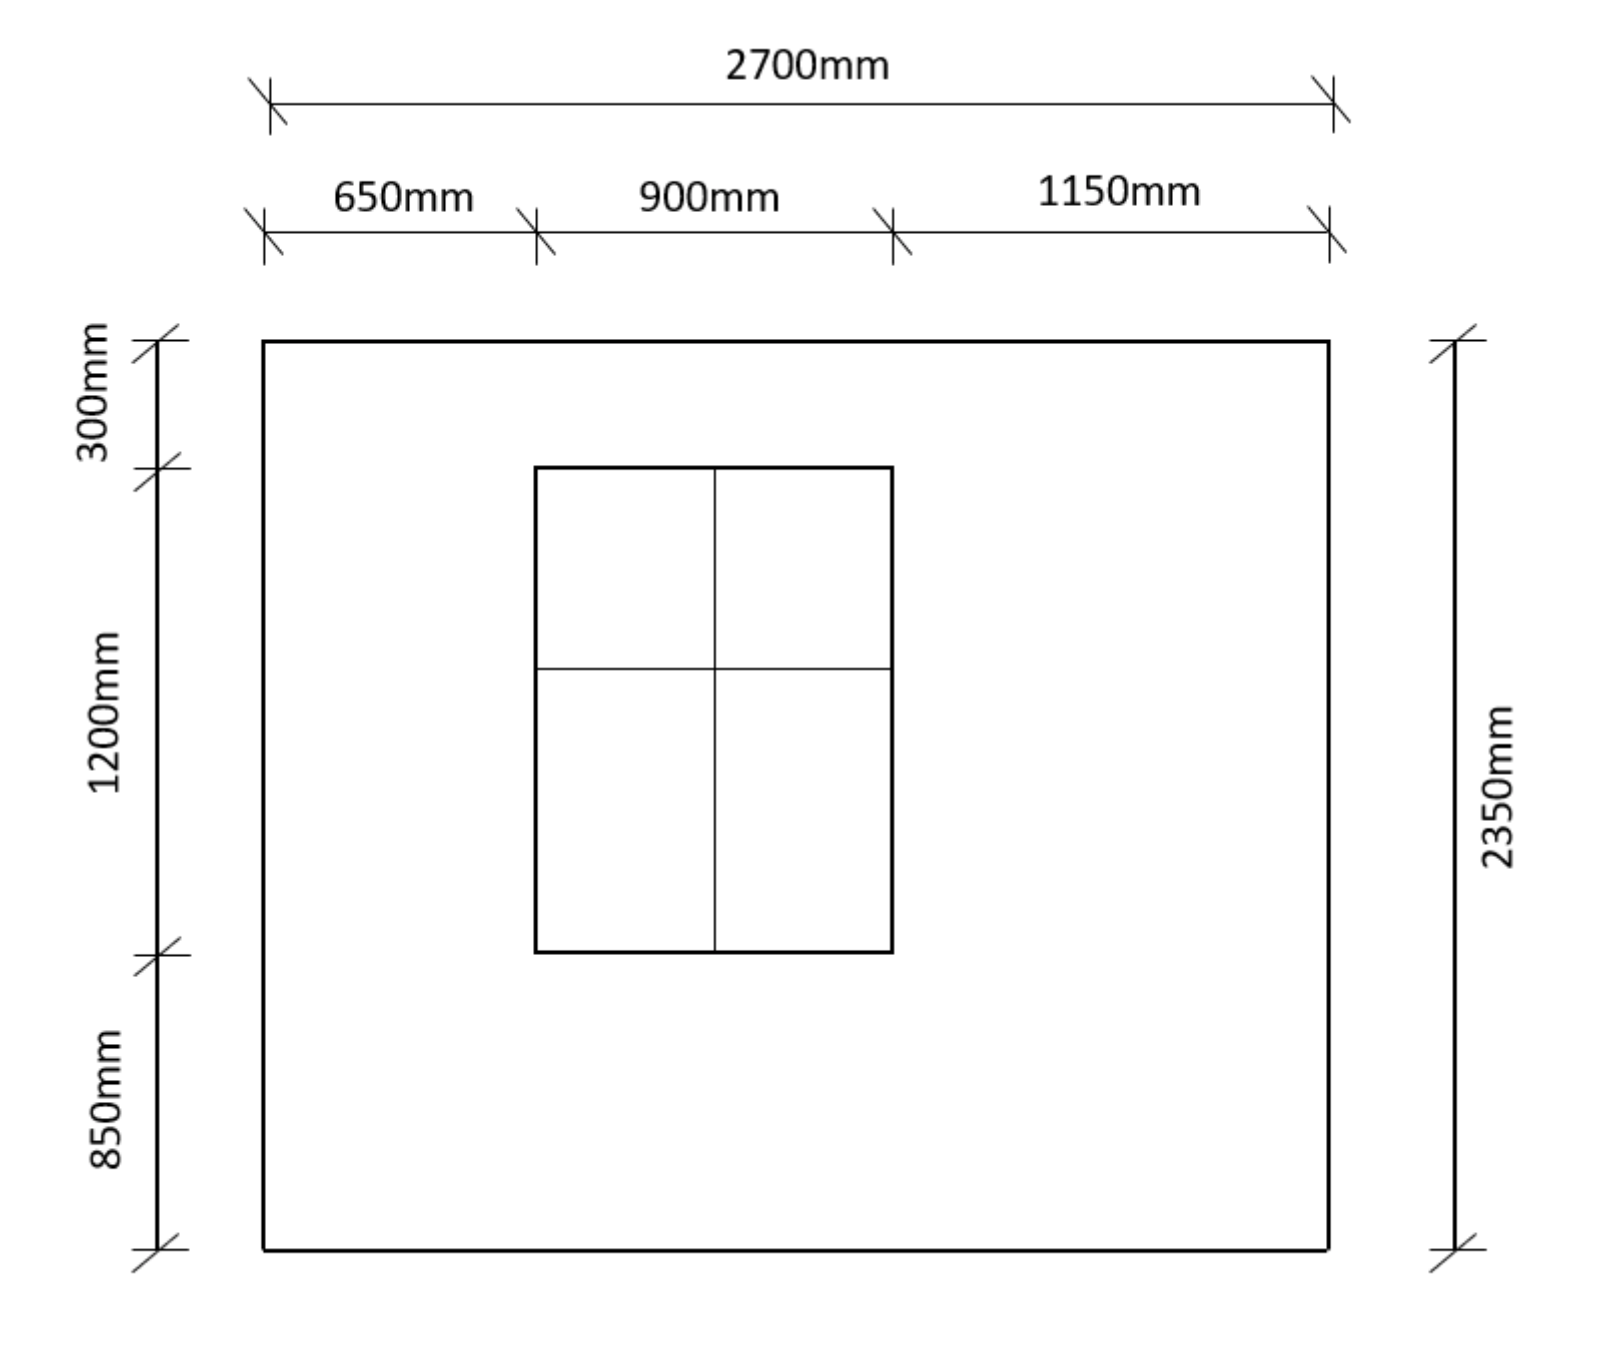
For a more comprehensive bathroom plan you will need more detailed measurements. These include window and door positions, as well as the current position of the toilet. These measurements can be added to the plan you have started, or you can create elevational sketches of the walls as in the example below.
STEP 4
Measuring the height of the ceiling

Here’s a technique that means the measuring tape won’t fold back on itself. To start, stand near a wall.
Now, with the tape’s flat metal end sitting on the floor, extend the reel out and hold the tape against the wall. Keeping hold of the reel, feed more tape out while running it against the wall. You should be able to support the tape as it lies against the wall until it reaches the ceiling. You might want to take the measurement in several places to ensure the correct values – it’s not uncommon to find ceilings which vary in height by several inches in the same room, especially in older properties.
STEP 5
Check your measurements

Finally, it’s important to check your measurements are correct before you do anything else. One simple check is to ensure that parallel walls match. We will check that the measurements you provide us with will be enough for us to start a design and will contact you if we are unsure on anything. However, as we can’t gain these measurements ourselves, you should run the final plans past your chosen contractor for validation.
STEP 6
Take pictures

The more pictures you take of your existing room the better. Take pictures of the overall space, as well as key details such as coving or fireplaces. These will help us illustrate a more realistic design for you if you choose to keep these features.
STEP 7
Complete our online form.
We will no doubt have a few questions about your project, but this is where you can provide us with details of your budget, timelines and your choice of style. Then simply send your plans to us.